 By peter_lzh
 ai-website-cloner-template: Clone Any Website into Clean Next.js Code with One Command (28.7k Stars)
I spotted a repo on GitHub Trending with 28.7k stars called ai-website-cloner-template. The description is one line: one command, and an AI agent reverse-engineers any website into clean Next.js code. I cloned it and ran it. On the left was the original site, on the right the clone — I stared at the side-by-side comparison for a long time and barely found any obvious differences. This is not a crude screenshot-to-HTML conversion; it truly decomposes the page into React components, Tailwind styles, and TypeScript interfaces.
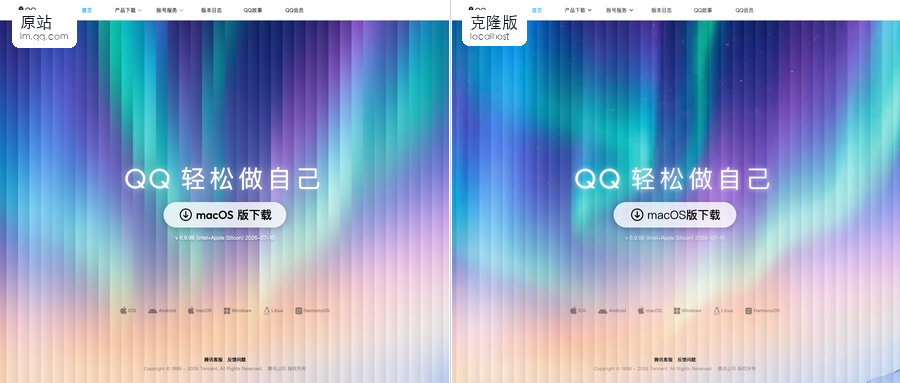
Seriously impressive.
Overview
At its core, ai-website-cloner-template is a reusable template project. The author has already set up the entire scaffold, so we don’t configure the environment from scratch. The core logic lets an AI agent automatically reverse-engineer a website: screenshot analysis, design-token extraction, component spec generation, parallel coding, and visual QA.
Cloning a site takes a single command:
The Five-Stage Pipeline
The author splits the cloning process into five clear stages with well-defined inputs and outputs — no black box.
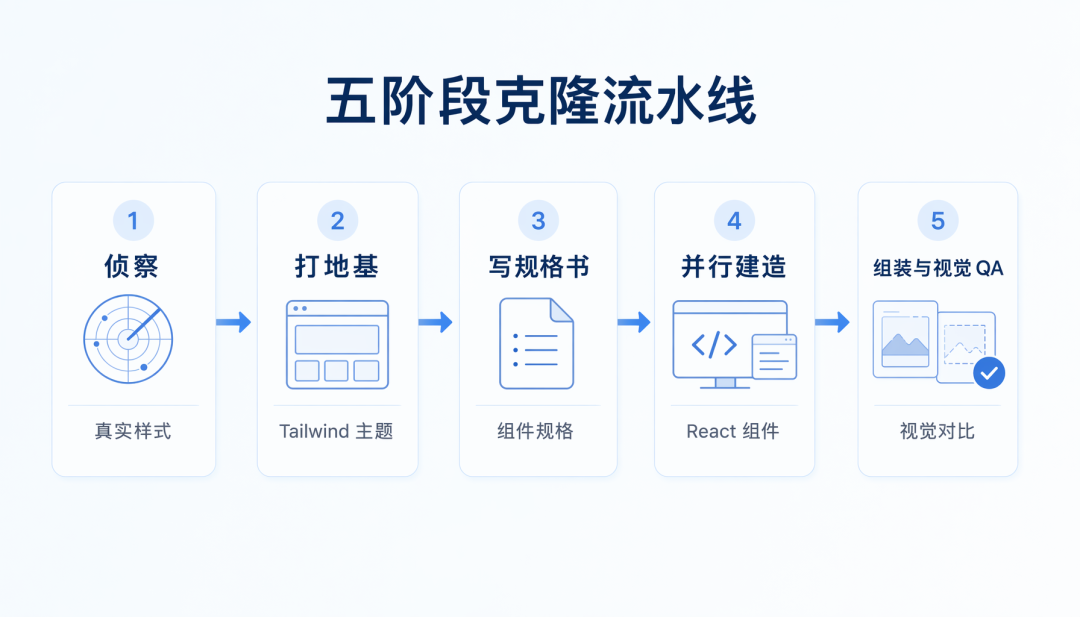
Recon: the agent inspects the target site first
The agent opens a browser, scrolls the page, clicks buttons, hovers over elements, and switches resolutions to check responsiveness. Design tokens — colors, fonts, spacing, animations — are all extracted. It uses a Chrome MCP integration so the agent operates the browser directly and reads the real computed styles, not guesses.
Foundation: update the global config
Swap fonts where needed, write color variables, adjust the Tailwind theme, and download all image and video assets into the public directory.
Specs: one document per component
The agent writes a detailed spec for each block under docs/research/components/. getComputedStyle() values, interaction models, multi-state content, responsive breakpoints, and asset paths all go in. Each builder reads the doc before starting — no guessing.
Parallel Build: multiple agents work at once
Multiple builders run in parallel, each in its own git worktree — one for the Hero, one for Features, one for Pricing, none interfering with the others. The author stresses every teammate must work on an independent worktree branch, and the orchestrator merges at the end; otherwise multiple agents editing the same file at once will “fight” in seconds.
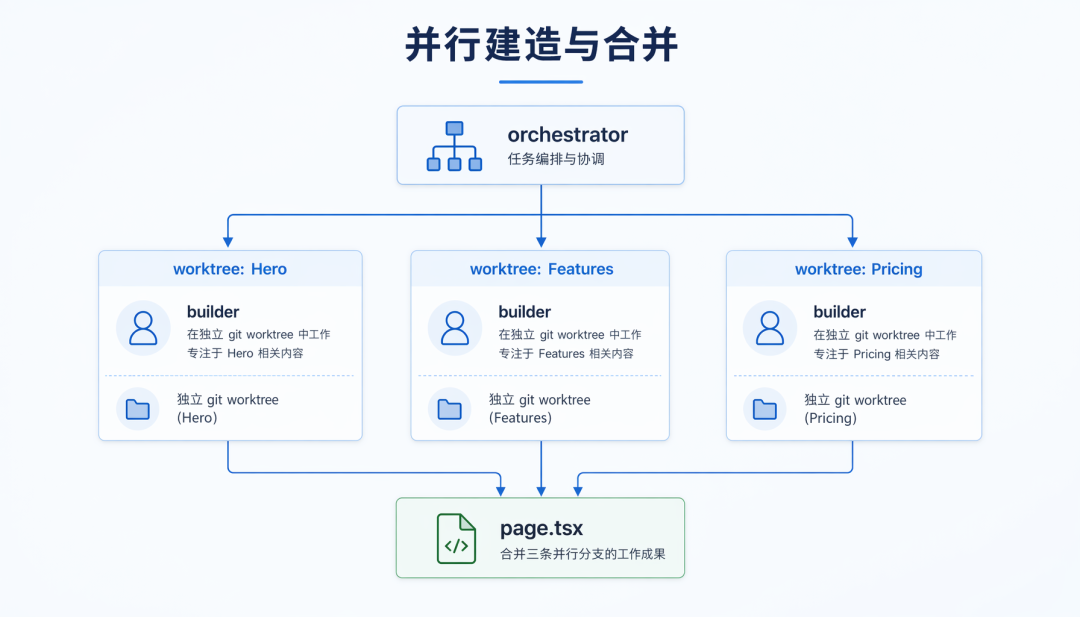
Assemble & Visual QA: put it together, then compare
After components are merged back into page.tsx, the agent compares the original and the clone side by side, testing both at 1440px desktop and 390px mobile. Any difference triggers a check of the spec doc: if the spec was wrong, re-extract; if the spec was right, fix the component. Nothing passes until everything matches.
Running It for Real
I used the Codex desktop app, and the whole process was smooth — no manual clone, no npm install; one sentence got Codex to install the Skill.
Step 1: Install the Skill with one sentence
Open Codex and hand it the repo URL. Codex handles everything; the Skill installed in 1 minute 51 seconds to ~/.codex/skills/clone-website, with SKILL.md verified. The skill name is clone-website, so the next conversation just needs the target URL.
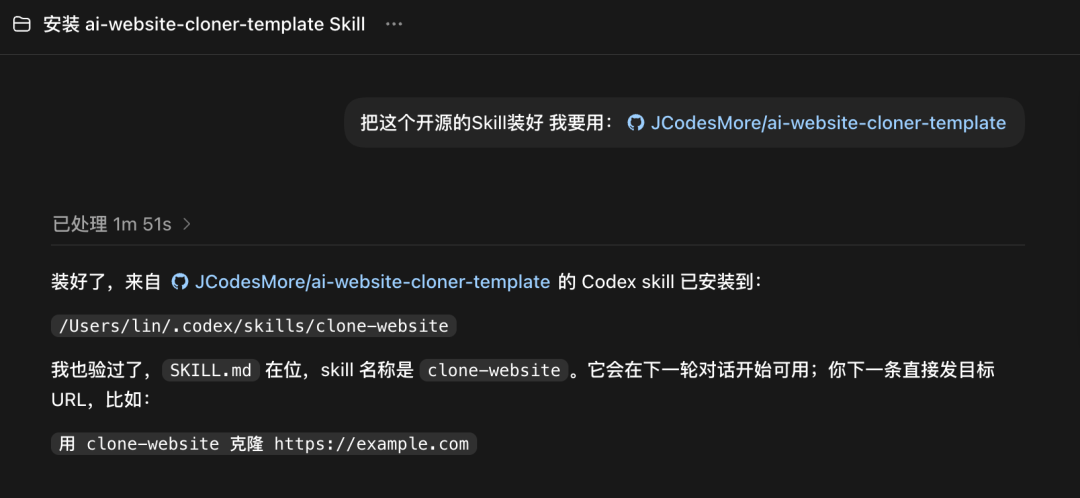
Step 2: Drop a URL and let it work
After installation I simply sent a target site. Codex kicked off the five-stage pipeline; the terminal shows progress — Reconnaissance, Foundation, Component Specs, Parallel Build, Visual Diff — each step clearly labeled.
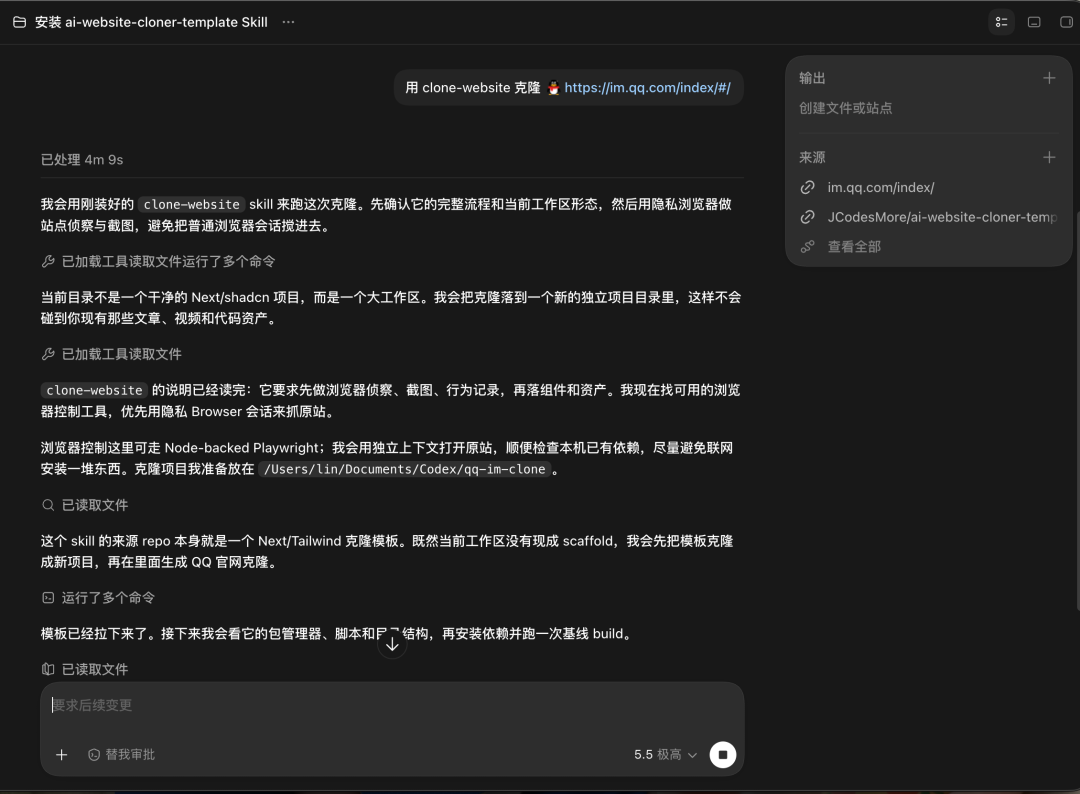
Step 3: See what the recon stage did
Codex opened a browser on its own, taking screenshots, scrolling, and extracting design tokens. I never touched anything — it pulled colors, fonts, spacing, and animations by itself, again via the Chrome MCP integration for real computed styles.
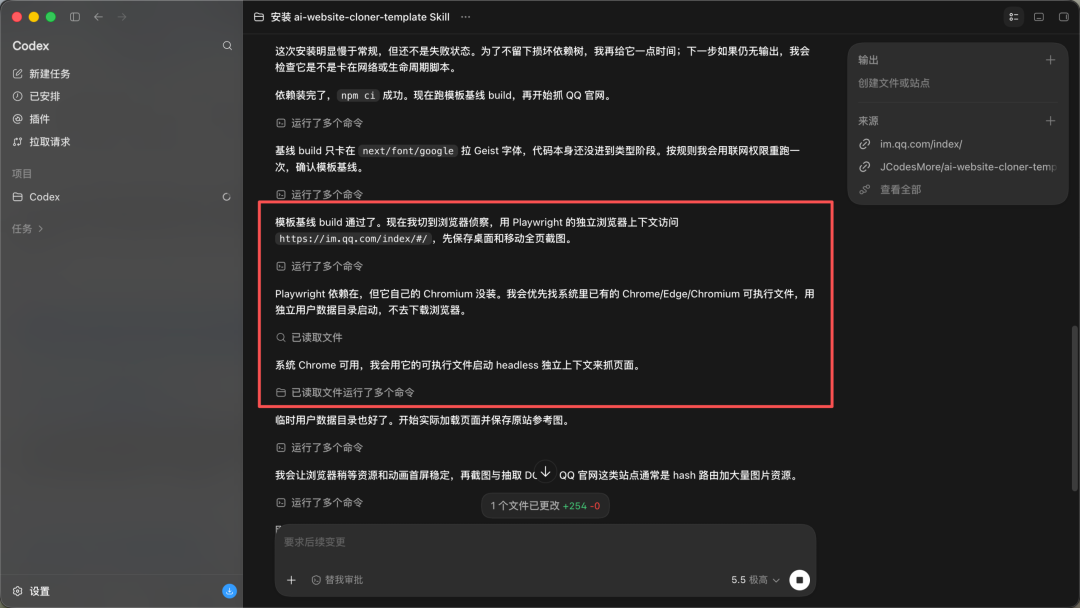
Step 4: Check the generated component specs
After cloning, the docs/research/components/ directory holds a spec doc for each block. I opened one — it is strikingly detailed: exact getComputedStyle() values, interaction models, multi-state content, responsive breakpoints, asset paths. Each builder reads this and gets to work without guessing.
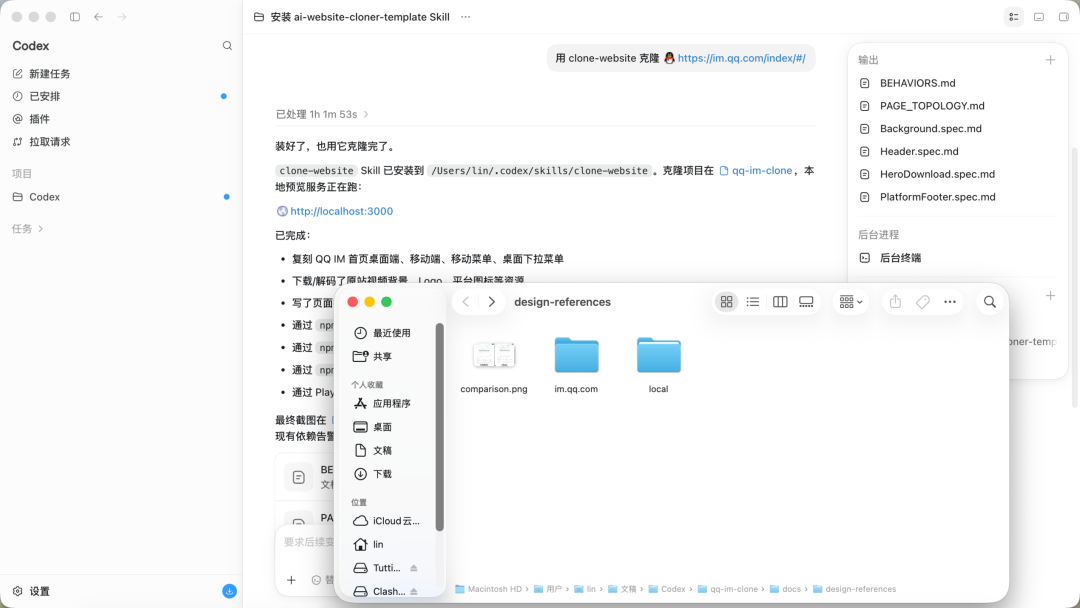
Step 5: Launch local preview to see the result
Open localhost:3000 and compare the original and clone side by side. I tested both 1440px desktop and 390px mobile — the result is genuinely close.
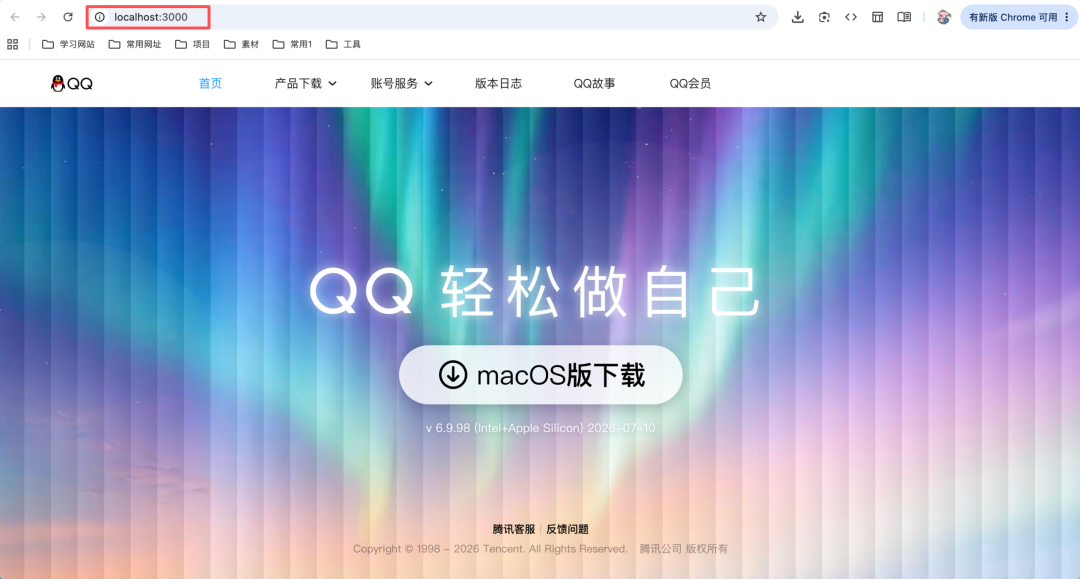
99% identical — the rest is just fine-tuning.
Step 6: Inspect the generated code structure
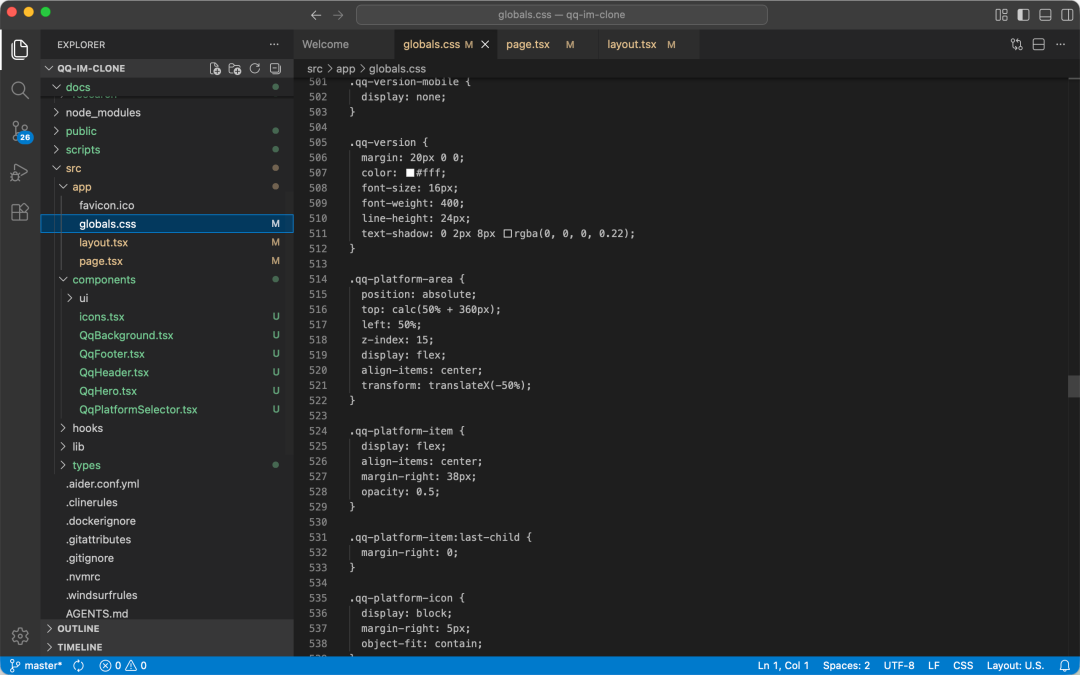
The cloned code is not a pile of junk; it is a clean Next.js project. src/components/ is split by block, ui/ holds shadcn/ui components, icons.tsx holds extracted SVGs, and public/images/ and public/videos/ hold downloaded assets — ready for further development the moment you get it.
Quick Start
Just two environment requirements: Node.js 24+ and a working AI coding agent. The steps are clean:
- 1. Install the Skill in one sentence inside Codex: install this open-source Skill — I want to use: JCodesMore/ai-website-cloner-template
- 2. Send the target URL: clone https://example.com with clone-website
- 3. Wait for Codex to finish the five-stage pipeline
- 4. Start the local preview: npm run dev
- 5. Fine-tune as needed
If you use a different agent, open AGENTS.md for the corresponding instructions. Common commands: v0.3.0 added a GitHub Actions CI quality gate that runs checks on every push and PR. Run npm run check locally first to avoid surprises after pushing.
My Take
This project made me realize AI agents can genuinely do real engineering work — not the toy of “help me write a button,” but breaking a complex flow into something reusable, orchestratable, and verifiable. Worktree isolation avoids conflicts, spec documents remove guessing, and visual QA guarantees delivery quality. Every step lands on a real engineering pain point.
But it has boundaries. What it clones is a pixel-level replica, not an understanding-based refactor. If the original has bad code structure, the clone inherits it as-is. It solves “from nothing to something,” not “from bad to good.” After getting the code, you still have to review, optimize, and adapt it to your business.
Even so, compressing a website clone from days or weeks to dozens of minutes delivers real value for platform migration, code recovery, and competitor study. The 28.7k stars on GitHub are not inflated — it earns a place in the toolbox.
GitHub: https://github.com/JCodesMore/ai-website-cloner-template